Wednesday, 12 November 2008

I fixed it!

Thanks again for the encouraging comments on my ruffled top. I doubt I would have found the motivation to fix it if it wasn't for people urging me not to give up. I probably would have just thrown it in the bin. Boy am I glad now that I didn't. And the solution was incredibly simple in the end. I was inspired by kbenco's fabulous smocked solution to a bwof dress and here is the result:

Here's a close up:

And the back:

I might actually wear it now!

Since I've never smocked before I kept it simple. I ruled four lines in the appropriate place 1cm apart and used the stripes as a guide for gathering. Then I worked two rows of honeycomb stitch, following the instructions in my trusty Reader's Digest New Complete Guide to Sewing (aka my bible). I made a long tie belt, anchored it to the back of the pleats (on the inside) with a few hand stitches then passed the belt to the outside through buttonholes on either side of the smocked panel that are concealed by the ruffle. Here's a blurry close up of the smocking:

I didn't finish my Melbourne Cup dress yet, but it was so wintery last week I wouldn't have been able to wear it anyway. But here is my finished hat - sorry for the mug shot! Sadly I didn't win the competition - the popular vote went to the novelty hats - but I had fun anyway.

Saturday, 1 November 2008

Melbourne Cup Hat

The Melbourne Cup is a huge deal in Australia. Of course it's biggest in Victoria, where they get a public holiday, but even all the way over here in Perth we get pretty excited. I'm not a big gambler, five years working as a croupier in a casino cured me of any urges of that nature I might have had, but even I will lay down a couple of dollars on cup day - just to be involved.


My work social club is putting on a lunch and there will be a hat competition. I thought I'd make one just for something different.


Here's what I started with - a mini pill-box hat made from sinamay, a bunch of feathers that came from a kit to make a hair clip, and some braid. I think I spent up to $25 tops. Everything came from Spotlight - that place can deliver sometimes even though the experience of going there is almost always a nightmare.

I started by sewing 5 ostrich plumes in a fan shape to the edge of the hat with the curve going over the base. Make sure you give each feather a good tug to make sure it's attached. If your sewing isn't secure the feathers will slide right out.


Here it is from the front. Apologies for the photos, it took me a while to twig that the hat is the same colour as my wall (is it weird that in the nearly four years I've lived here, the only room I've got around to renovating is my sewing room?)


And from the 'hat' side.
Next I sewed turkey feathers pointing downwards, I allowed them to twist a bit as I did it.

Then I added some stripped feathers to the ostrich feathers to give it more dimension.
Finally I added a sinamay flower to hide all my workings.


It's Cup day on Tuesday and while I would have loved to make a new dress, I am taking things really slow at the moment. Wish me luck in the competition! I have no idea what the prize is, I just like being part of it!

Oh yes, and a little bit of good news came today. I have an interview for my job - it's in two weeks. I think my mojo is coming back so I should be okay to make at least a garment, if not a whole outfit.

The Date Dress Disaster

Ok. So just when I thought I was back up and running, my sheer exhaustion comes back to haunt me again. On Thursday night I cut out my date dress, the dress I was hoping to wear for mine and my fella's two-year anniversary on Monday.

The pattern is one I've made before Simplicity 3678, the Threads collection knit dress. I'm not sure what the deal is with the threads dresses. I've made two of their coats and one of their skirts and they seemed true to size, but the two dresses I've made have been ginormous! I would normally cut a 12 with an FBA (sometimes) at the top and a 14 in the waist and hips, but in the threads dresses I can cut a straight 10! I found this particular style was big in the back too (my back is a little narrow). Here is my previous effort.

To prepare my pattern I took 3cm out of the centre back of the bodice and midriff piece. On the front skirt I took the 3cm out at the top, tapering it to nothing at the hemline and I made a 2.5cm sway back alteration. Hang on, what was that you say - the front skirt? Yes, I made all my back alterations to the front skirt! But I only noticed after I'd spent half an hour setting up my bloody overlocker this morning. Unfortunately I couldn't salvage the pieces and now I am one date dress short, but it's okay I'm sure I'll find something to wear and, after all, it's the company not the clothes that count most.

I can look back with humour now and I consider it a lesson learned about being aware of my own limits but at the time, let's just say I didn't have quite such an 'adult' perspective on it. I suppose it's one quick way of reducing my stash!

The Meatball Cardigan

Hi everyone,

Please excuse my absence. Work has been completely mental lately. We’re horrendously busy getting some big projects off the ground, plus we are short-handed by two people, who are not likely to be replaced in the near future. On top of that I am in the midst of having to apply for my own job, which is a peculiarity of working in the public service – at least in Australia, I don’t know about other places. It is starting to get on top of me and I’m feeling very stressed but never fear I am busy in my creative life too – it’s the only thing that keeps me sane!

Thank you for all the helpful suggestions on my ruffled top. Don’t worry I am not going to abandon it. You can probably tell from the post that I was feeling a little discouraged at the time. I have tried back darts but they didn’t work on their own, I think it will be a combination of back (and possibly front) darts and side seam shaping. I have the seed of an idea on a tie belt and it may also require some narrowing in the centre back (even though it’s my normal size it just seems too big). I promise I will work on it and will post the result, I just need to have a clear mind to do it.

I haven’t been doing any sewing, not only due to lack of time but I’ve been pushing myself to get a knitting project finished. And guess what? I’m not happy! My fella said I look like a meatball pizza. I wouldn’t go that far, but it doesn’t really suit my personal style. I became concerned about the bobbles while knitting it, but pressed on regardless. In hindsight I could have easily just done the lace pattern without the bobbles, but live and learn as they say! It actually fits really well and is comfy, so it will be perfect to throw on at work when the air conditioning gets a bit chilly. Maybe the bobbles will grow on me and I won’t feel quite so much like a clown in it.
The pattern is a Debbie Bliss pattern that was published free on the web, but I don't think it's available anymore. If anyone wants a copy, I'll be happy to send it if you just drop me an email. I did a search for the pattern and came up with this link which shows the cardigan made up without bobbles, it looks really nice.
The cardigan is knit in one piece. You do one front and sleeve, then the other front and sleeve, join them together, knit the rest of the sleeves and down the back then knit on the bands. Finally you sew the underarm seams and that's it. Aside from having to knit with a lot of stitches, it's really very easy.
Here it is before sewing up.
The mitred corner on the front - I could not find a satisfactory way to work the increases here so it looks a bit rough.
Here's the 'meatball' pattern up close.
My posting this project has been delayed a couple of days due to the photos of me wearing it. I looked so tired and cross that when I saw them I seriously considered getting botox! I guess, the whole work thing is wearing me down a bit so I'll make more of an effort to relax so I don't start to frighten people! Anyway, here are some new photos, taken today (Saturday) so I don't look so tired and cross.
I have set a huge goal for myself this weekend to make a date dress (cut out already) a work dress for Melbourne Cup day and a hat for a Melbourne Cup lunch. I have all the materials and as long as I can convince the fella to have a boys night on at least Friday or Saturday I think I’ll be okay. After that I will need a job interview outfit – I know everyone at work already knows what I look like but any excuse right?

Thursday, 16 October 2008

Ruffled Top is Done

So here is the finished top. Cute right?

Well yes, it looks cute FROM THE FRONT. But check out the side and back views:

Preggers
and tree trunk:Just a bit shapeless for me I'm afraid. I've tried tucking it in and that doesn't really work either so I guess this will have to be put aside for those 'too hot to care' days.

The pattern is V2946, a pattern I have lusted over for ages (my Mum thinks I'm mad and maybe I should listen to her more often). After seeing this review over at Sew Tessuti I decided to buy the pattern and shamelessly rip this top off. I guess you need to be 20 years younger and about 20 kilos lighter to pull off this look! Still I really like the front view and am pleased with myself for all the time I put into french seaming and rolled hemming.

For my next project I have cut out the bow tie version in this pattern from silk yoryu. I will be very put out if this one doesn't work either.

Sunday, 12 October 2008

Edging Ruffles

I've been making some ruffles lately and it occurred to me to document some of the edging methods that can be used. The circular edge can be tricky to handle and it very much depends on your fabric as to what technique you would choose. As well as this, the different edgings give different effects, so consider the type of garment you are making - casual or dressy, something you will wear regularly and throw in the washing machine or wear occasionally and dry clean with care.
I have made these samples in contrasting thread so you can see the work clearly, but you should usually choose a matching thread (or blending for a print) as it will help disguise any 'quirks'.
The first sample is the 'stitch and pink' method. This is a pretty casual look that won't take too much hard wear. It's perfect for the 'deconstructed' look and it's also the easiest way to finish an edge. You simply run a straight stitch around the edge and then use pinking shears to trim the raw edge evenly.


The next edging is a method that I learned while I was studying costume. I worked on a set of ballet tutus with organza overskirts. This edging was pretty hard wearing and the stitching disappeared into the net layers underneath, which was great as we didn't want there to be a heavy stripe where the overskirt ended. You simply straight stitch around as before, trim the edge to about 3mm and then zig zag over your straight stitching. Make sure on the zig zag round that the needle falls off the outside edge to really finish it well.


Here's one of the finished tutus.


Next is the rolled hem made on an overlocker (serger). For years this was the only method I used. If your overlocker is set up just right, this can be a really easy and attractive finish on many fabric types. If you pull the edges as you're sewing then you will end up with a really wavy edge, I think they call it a lettuce edge (?).

This next method is my current favourite. I used to try and try to use a rolled hem foot and it drove me mental. So I gave up and used my overlocker for everything. When I started working in bridal I was horrified to learn that almost every dress was finished with a rolled hem - so I needed to learn quick! Running around a full hem on a bias cut skirt in silk charmeuse (on one of those fast, jumpy industrial machines)really cures your fear of this method, although I can't recommend it as a learning technique! But it really is worth mastering.

Below is a hem using a rolled hem foot and a straight stitch. I find it a very polished finish and it doesn't have that home-made feel that an overlocked rolled hem can (sometimes) have. It takes practice though, so be kind to yourself and start on crisp lightweight cottons and straight-ish edges and you'll get it in no time. The trickiest bit is starting and there are lots of tips around about how to get started. To be honest I just sort of push the fabric in and then use a pin to pull it through enough to plant the needle. I sit myself to the left of the machine as I find it easier to feed curved fabric into the roller that way, but really it comes down to practice.

My final sample also uses a rolled hem foot but this time I used zig zag. This is a more casual finish and on the right fabric can create a pretty scalloped effect (you could probably use your blind hem stitch for a similar effect). This method is slightly easier than using the straight stitch too as it's a litle more forgiving if you go off course - your edges are a bit more firmly anchored.

One thing that is always a bit of a fiddle is getting a nice corner. I thread a needle with two strands of thread and pull it through the corner so I have four 'tails'. I use this as a handle to start me off. This stops you getting really stuck on the lump at the corner.

I hope these few techniques are useful to you. I'm not really a 'ruffly' girl but it's always handy to know a few different techniques so you have a choice. I never use the methods in the pattern instructions, seriously I just don't think they work.

Next time I'll show you the top these ruffles are attached to.

Tuesday, 7 October 2008

Built By Me

I would like to start by saying a sincere thank you to everyone who left comments on my winter coat, both here and over at Pattern Review. It really brightens my day to hear such lovely compliments from people I have never met but who I consider my peers. And yes, I have been fortunate enough to wear it a few times over the past couple of weeks. I don’t mind putting it away until next year now.

I took a few days off after I finished the coat to decide what to do next, cut out three tops and then promptly fell ill with a cold. I feel a lot better now but sound awful (I got sent home from work today for sounding ‘like a chainsaw’), curse the hacking cough that stays with you for ages (mind you, my sister has had fluid on her lungs for weeks so I got off lightly!). My fella has been sick too but fortunately the WII keeps him out from under my feet and I have got little bit of sewing done here and there.

The first of the three tops is Simplicity 3964, a ‘Built by you’ pattern. Even though I am a bit long in the tooth now for junior patterns, I just can’t resist them. I think this is a fairly grown up version though, so I am happy.

Here's the front:

A close up of the front yoke:


And the back:

First the likes.

1. It was cheap. About $3.00 worth of lace, left over lining and polycotton poplin I bought for something else.

2. It will be comfortable. I don’t really go for sleeveless at work, but our summers here are so hot I can’t bear anything under my arms. I love these ‘sleeve on the top, sleeveless underneath’ styles.

3. It’s cute. I like how the colour combination turned out and I think it looks quite fashionable.

4. It’s loose but not too preggy looking – hide my belly but without making people feel the need to stand up for me on the bus, or ask if I am pregnant – both of which have actually happened (the shame!).

Now the dislikes:
1. It’s a little small. I’d already cut the pattern in a 10 some time ago, a 12 would have been better. I’m not sure if you can tell and I’m not encouraging you to perve but the girls are pretty well crammed in!

2. The sleeve are cute but part of me thinks they look a little odd – a bit ‘Lost in Space’ costumey. Or maybe ‘The Jetsons’. I’m a space nerd anyway so I don’t really care too much.

That’s all. Read my review for more technical stuff if you like. I promise I’ll try to get my next projects up a bit quicker.

Wednesday, 24 September 2008

My last winter project for the year

Last week was wet and wintery, and Monday morning was a chilly 2 degrees (Celsius) – I really could have used a new black coat. But no, work and other commitments kept me from my sewing machine all week. But then, on Sunday, I got a chance to put together the lining and pop it in the coat and on Monday night after work I stayed up late to finish all the hand sewing. So (fanfare please…) here is the finished coat.

Front:
Back:


I am so happy with this coat. I couldn't wait to wear it so please forgive the slightly rumpled appearance due to a couple of bus rides in it.

There are a couple of very minor fit things that I’m not thrilled about but overall I think it’s great. I’d never find anything in the shops that fits this well.
I love the details. The military look pops up most winters, but this coat is not so military that it will look stupid if it isn’t a look of the season.

Collar and epaulettes:

The front waist with 'half belt' insert:
This is the lining, it's a silk cotton blend, isn't it cute?
I cut a 12 at the top and a 14 from the waist down. The fit is pretty good although a tiny FBA would not go astray, plus I think the shoulders are the teensiest bit wide.

The sleeves have drag lines at the front, which happens all the time in my bought jackets – I am trying to fix up my posture, so this might yet get remedied (although I may try and address it in my next jacket just to see how difficult it is to fix). Truth be told, the only reason I didn’t move the sleeve around is because I only noticed this problem after putting in the sleeve head and shoulder pads.

I also lifted the back waistline of the skirt by 1.5cm (by cutting 1.5cm off the top of the skirt at the centre back, tapering to nothing at the side seams). It’s strange, my nape to waist measurement is normal for my height, but I am long between the waist and hips – yet I always need to shorten my back waist. I must have a slightly sway back. The reason I don’t buy many clothes is because they all puddle in the small of my back. I should start dealing with this at pattern stage – I dare say everything will start to look better then.

I used Gutterman topstitching thread for the topstitching and recycled the buttons from my old black coat, which now resides in my cat box. My lucky girls get to sleep on Stella McCartney.

I did get to wear it on Tuesday morning which was quite chilly, but today was very warm. I hope to have at least a couple more cold mornings before I put this one away until next May!

Ah now, what next? I still have the usual pile of projects on the wish list, but not a definite next job. Finally, the freedom to sew what I WANT more than what I NEED! My rough plan is a couple of quick and easy tops, followed by a summery suit. It’s a public holiday on Monday, so I hope to get a lot done. However, it’s my fella’s birthday party on Sunday so I’ll probably get roped into cleaning that up instead.

Tuesday, 9 September 2008

Here is a brief progress report on the black winter coat. I am LOVING this project!

First I’d like to rave about the fabric. It is a very lightweight wool, a crepe I think. It’s so fine that if you hold it up you can see a fair amount of light through. It’s very soft and slightly fluffy. On the downside it magnetically attracts cat hair, but you can’t have everything! I bought it on my recent trip to Sydney, at Tessuti in Darling Harbour. I thought it was a bargain at $29.00 per metre, even though it’s only 114cm wide. I didn’t get enough and had to order more over the phone. I have to say it was a very easy experience and the extra fabric arrived the next day.

I fused all the pattern pieces with sheerweft which will stop any sagging and provide a little extra body in the coat. The entire bodice, as well as the front of the skirt is interfaced with lightweight shapewell. In addition, I pad stitched the interfacing to the under collar by machine, using the same method as I used for the gold silk jacket I made earlier this year.

The pattern was a bit more traumatic, with all my to-ing and fro-ing. I am so glad I got the extra fabric and went with my original plan. I love this pattern. I have to say though, what the %^&* were Simplicity thinking when they made up their sample garments? Apologies to anyone who likes the photographed models, but I particularly find that pink corduroy thing to be hideous. Thank goodness for websites like Pattern Review – I have fallen in love with many patterns that I would have overlooked if the pattern envelopes were all I had to go by.

So without further ado, here is the coat so far. I cut a 12 at the top, tapering to a 14 at the waist and below. The fit is great, but if you live in a climate that warrants an ‘overcoat’, you may want to go up a size from normal. Lucky me, I live in Perth where the winters are pretty mild so my winter coat only needs to fit over a thin jumper (sorry, sweater – I was born in England!).

The front so far:
And the back:

Obviously it still has a way to go, but I hope you’ll agree it’s looking pretty good. I plan on unpicking the back waist seam and taking in the skirt pieces a little to get rid of the ease – I don’t like the drag lines. I hope this will help. I know that historically women would have worn a little pad to support high waisted things from collapsing in the back so I may have to make a ‘modern’ version by sewing organza or something similar into the back to give it some ‘oomph’. I have not put any intrfacing in the hem either - but I think it needs it.

I hope to get this finished on the weekend, so I at least have a slim chance of wearing it this year!

Friday, 5 September 2008

Spring has Sprung

I've taken a break from my black coat to whip up my first spring project - New Look 6755.

I can't say I'm overly thrilled with the result, but it's wearable with a camisole underneath. I only have to do an FBA very occasionally and it never occurred to me that I might need to make one on a style like this, but this pattern really needs it! I came across another review that had the same problem, so it's not just me. Here it is on my (B cup) dummy.


Overall it's a cute style but I have a few niggles with the pattern.

First, I don't get all the lazy shortcuts in construction these days. Sure bias binding is a great way to finish armholes and necklines in lightweight fabrics, but this top would look so much better with a proper facing (IMHO). I ironed stay tape to the front edges (which is not suggested in the instructions) and it hasn't stretched or buckled or anything, I just think it would look smoother with a facing. Ditto the back neck. Anything with a collar looks better when the neckline is faced, it just supports the weight better. Plus, edging the front edge with bias means you have to finish the collar around the outside of the front edge - it's pretty tricky to get that looking good - see below for example. Lucky I have long hair which I almost never tie up!

While I'm on the collar, I had to shorten it by 5cm in total to fit it onto the neckline. Granted I cut this top out on the living room floor, at night and while watching TV, but I'm pretty sure I cut the right size. Strangely I ended up with a nicer shaped collar anyay so I don't mind too much.

Finally, here's a look at the side tie. I originally made ties from fabric but the top really lacked something, so I replaced them with white grosgrain ribbon. I think it really lifts the whole thing up.
My black coat is cut out and prepared, I hope to really make a dent in it this weekend.

Wednesday, 27 August 2008

The Saga of the Black Coat

Never fear, I have been busy – I just have nothing to show for it yet.

Even though spring is definitely in the air here, I feel the need for one last winter project. I need a black coat. I have a black coat already but it is hideous and incredibly unflattering. It’s from the Stella McCartney for Target range and I got it on sale, at the time I thought it would be nice to try something different and a bit more ‘fashion’, well let’s just say I’ve learned my lesson there! I have had people stand up for me on the bus thinking I am pregnant and then you have the awkward situation where I don’t deserve the seat, but don’t want to upset a kind person by knocking them back. Therefore, I think it is best for me and the community to have a non-preggers looking black coat.

I bought some beautiful black wool fabric from Tessuti when I was in Sydney a couple of weeks ago. I knew it was narrow so I bought 3m to be sure. Once I got home I started going through my stash of patterns. The main criteria was that it has to go in at the waist. My first pick was Burda 8010 (OOP) altered to be single breasted– except it turned out I’d got the petite size (ok, I know it’s not that hard to lengthen it a bit above and below the waist but remember I am lazy and stubborn). Then Simplicity 4033 (also OOP) – this is promising, I’m thinking View D collar and trims but in the single breasted version. Threads patterns are quite good for me (hideous shift dress failure notwithstanding), I made their trench coat a couple of winters ago and love it. So I got all organised only to find I was about 20cm short on fabric – disaster!

After recovering I then went to Vogue V2538 (again, OOP)– a coat I love and I’ve had the pattern for years and years. Sadly, my former self had cut out a smaller size than I currently wear. I valiantly made a toile but it wasn’t going to work (yes, I know I could alter it but…remember – lazy!). By this stage I was completely over it and went back to knitting and watching the Olympics. Finally I set upon BWOF 09/07/104. I’ve seen several reviews of this coat (and Tany’s leopard version is fab), so I traced off the pattern and was all set to go until my fella said ‘isn’t that pretty much like the coat you’ve already got?’ Well no, it’s much nicer but he was right to notice it’s not exactly fitted at the waist!

So after all this, what did I decide? Back to Simplicity 4033. I rang Tessuti yesterday and bought an extra 0.5m of fabric and today it arrived by express post. I hope this weekend to have some actual sewing to show you.

Sunday, 10 August 2008

Crazy week

Since the Pattern Review My Pattern Competition ended (and if you haven't checked out the entries you really should - there is some amazing work!) I've been taking it easy a little. Well not really, my acting manager at work left a week ago on Friday and our new manager doesn't start until August 25. I am trying to get some really big contracts off the ground but it's pretty hard when there is no-one close by to give me approvals. Our acting, acting manager comes from a different department and while she is really nice, she is not a specialist in my field so I can't just run things by her. I also had to go to Sydney this week at pretty short notice. I flew over on Wednesday evening (4 hours), had a meeting on Thursday morning and then flew back on Thursday afternoon (5 hours + a half hour delay). It is not really unusual for people from Perth to do this, but it's been a while since I've had to and I'm a bit out of practice, plus I seem to have picked up one of those aeroplane colds!

Still, I did get the chance to visit the Darling Harbour Tessuti store and offload some of my hard earned cash! I bought some black wool for a coat, some spotted Japanese cotton and a remnant of a printed cotton voile - I'm sure they'll crop up here eventually.

Oh yeah, and I did some sewing...

I had never heard of Mrs Stylebook until I started reading people's blogs and I've only bought one - Winter 2007. This skirt appealed to me as it's a pretty easy draft to cut my teeth on. I was curious to see how the Japanese drafts would fit my curvy and (apparently) 3XL figure.

As this is a work skirt, I almost left the pockets off. I just don't like the look of topstitched pockets on dressy things - although I love it on casual garments. My work is pretty casual so it wouldn't be a problem but I wanted to have all the stitching concealed. I thought about hand stitching the pockets on but that wouldn't be strong enough. I finally remembered an old article I had cut out of an issue of Australian Stitches that talked about machine stitching pockets on. I dragged it out and decided to give it a go. Here's a bit of a step by step for those who haven't seen this before - I love the finished look and it's not as hard as you might think.

First cut out your pocket pieces and two lining pieces per pocket (so for two pockets use four lining pieces). I interfaced my pockets with some (extremely crappy) fusible interfacing, which I think is a good idea in most situations - just don't use the cheap sh*t from Spotlight like i did.

Sew one lining piece to each pocket piece and fold it to the inside as normal to create the faced top.

Fold down the seam allowance on the other lining piece and lay it on top of the lining side of the pocket unit with the seam allowance facing outwards. Sorry, this photo isn't terrifically clear.

Sew all the layers together and run a gathering thread around the rounded corners. Turn the seam allowances in using the gathering thread to help and press. If your seam allowances are more than 1cm then you should probably trim them back to 1cm at this point.

Lay the pocket in place on your garment and tack it in place with a narrow but long zigzag, just catching the folded edge of the pocket. I did this in blue so it would be easier to find and remove later.
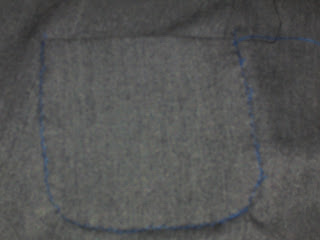
Now the tricky bit. You need to fit an open toed foot to your machine (you may be able to get away without one but I have one and had never used it before so...

Place the edge of the foot on the raw edge and stitch the pocket down through all layers from the inside - this ends up being about 2-3mm inside the folded edge which gives a really nice 'floating' effect. The narrower the pocket the harder it will be but the zigzag ensures it doesn't slide around. The first time I got couple of tucks in the curves but it was pretty easy to go back and fix it.

Then flip the back piece of lining against the garment and stitch by hand or machine close to the folded edge. Both sides of the pocket are now lined and all the raw edges are concealed.
See, isn't that neat!
To hide the last little bits of seam allowance you need to stitch down the top corners. I decided to do a little rectangle, but I dare say other techniques would look just as good. I counted the stitches to get the size as regular as possible.
Other than the pockets, the construction is basic - invisible zip, a couple of darts, the lining is eased to fit the lower edge of the waist facings and a hand sewn hem. And here is the finished skirt.
It's so nice that even though I've been sewing the best part of thirty years that it still challenges me. I'll probably make this pattern again, both for work and for casual wear and I'll definitely be putting my pockets on by machine in the future!